
Hardwood stairway systems explained
There are three (3) standard types of staircases:
- The closed in stairway
- The single open stairway
- The double open stairway
Staircase types explained
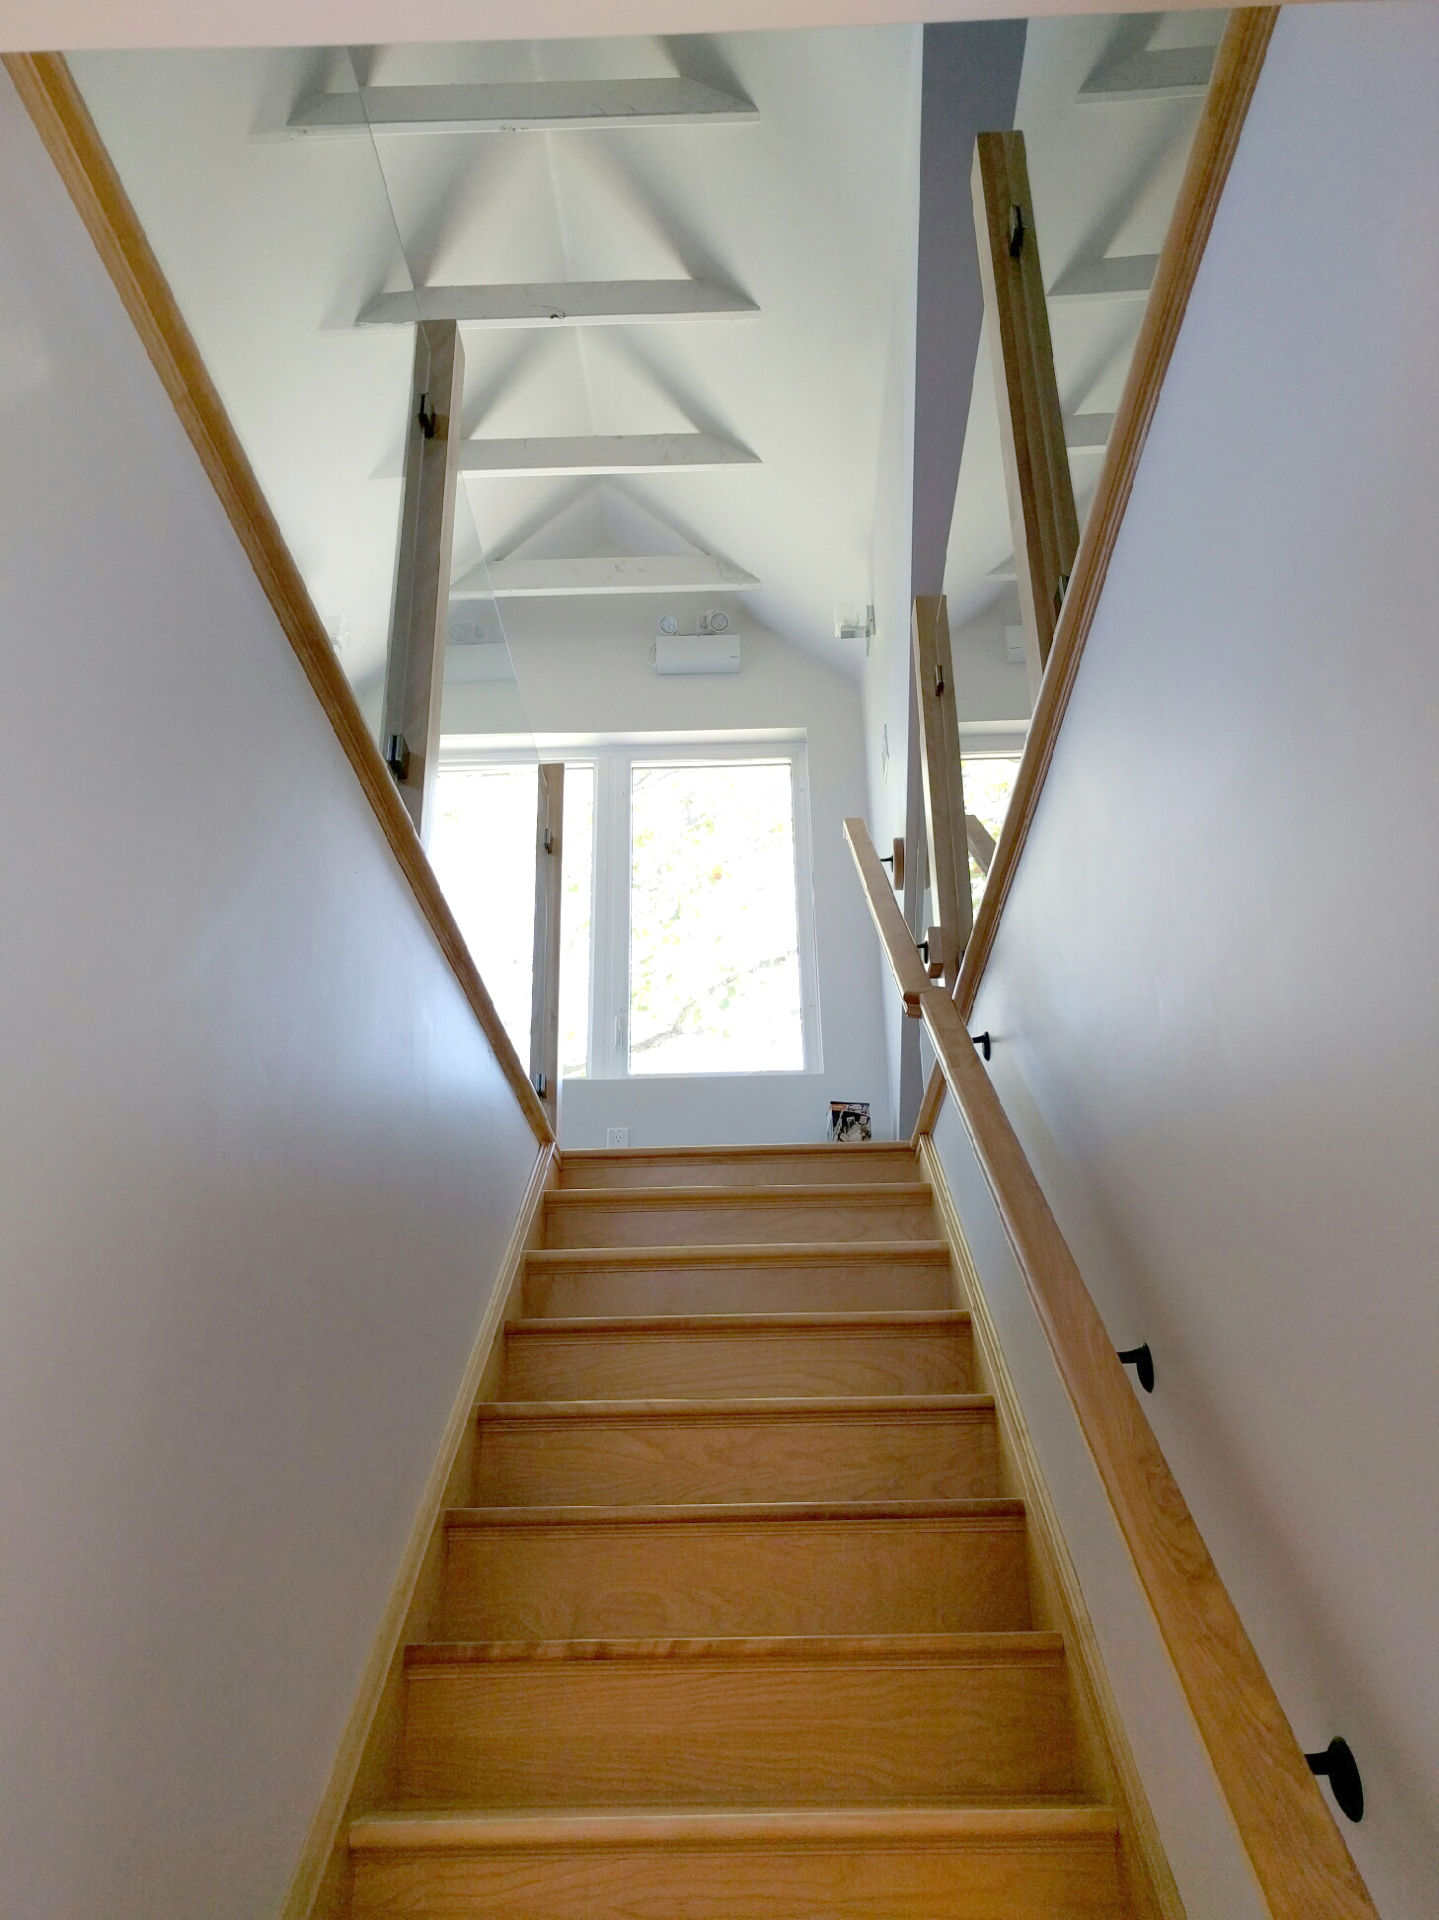
The closed in stairway: a staircase that is boxed in between two walls… having a wall mounted handrail on one side of the wall.
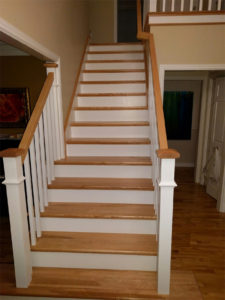
The single open stairway: a staircase that is boxed in on one side and open on one side… this staircase has a handrail system on the open side.
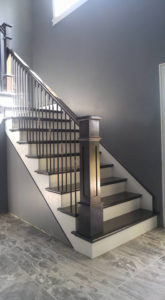
The double open stairway: a staircase that is open on both sides… this staircase has a handrail system on both sides.
All Three Standard Staircase Systems Are Shown In The Pictures Below.
#1. ‘The closed in stairway… Stair Treads With No Ends Open’
*** The stair treads have no installed miter returns ***
#2. ‘The single open stairway… Stair Treads With The Left End Open’
*** The stair treads are ‘left hand mitred’ ***
#3. ‘The double open stairway… Stair Treads With Both Ends Open’
*** The stair treads are ‘right hand mitred and left hand mitered’ ***
* Quick Tips On Knowing What Materials You Need For Your ‘Stairway System’:
Please Note: All stairways include two parts: ‘The Staircase’ and ‘The Handrailing’.
For the ‘Stairway’ you need: skirt boards that get attached to the walls for your sides, riser boards that get attached to the stringers ( on the vertical face) some people call them kick plates, and the stair treads also get attached to the stringers ( on the horizontal face ) these are your steps. If you are going with an ‘All Wood Staircase’ you need to use j-trim moulding and cove moulding on the top exposed edges of the skirts. If you are going with a ‘2-Tone Staircase’ ( wood stair treads, wood top rail, wood trim’s, white skirt boards, white riser boards, white balusters ) you can use j-trim moulding and cove moulding on the top exposed edges of the skirts or you can simply router the top exposed edges of the skirts. Cove moulding needs to be used under the treads front bull nose and side miter return ends.
For the ‘Railing’ on a ‘Boxed In Stairway’ you need to have wall mounted handrail. This rail is typically mounted to the wall with wall balls or wall brackets ( this are screwed into wall studs). Then the handrail is screwed into the wall balls.
For the ‘Railing’ on a ‘One Side Open Stairway’ you have a full rail system running up the left hand or right hand side of the staircase. You typically have a 48 inch Starting newel post and a 40“ baluster on the starting stair tread and one 36 inch and 40 inch Baluster on each stair tread and one 42 inch landing newel at the top mounted on the nosing.
For the ‘Railing’ on a ‘Two Side Open Stairway’ you will have a full rail system running up both sides of your staircase. You will need twice the amount of handrail parts.
* Split Entry Home Example:
For example in a typical split entry home your ‘lower set of stairs’ are most likely ‘boxed in’ and your ‘upper set of stairs’ are most likely ‘open one side’. You would have 7 box treads for the lower set and 7 open one side treads for the upper set. Which side of the tread will need a miter return end? Simply stand at the bottom of the staircase ( looking from the first tread up ) the open side of the tread will need to have a miter return end. Lets say the right side is open; you need 7 stair treads with right hand miters.
The materials for the lower set of stairs ‘the boxed in Stairway system’:
- 7 ea. – 48 inch Stair Treads
- 16 ft. – 9-1/2 inch Skirt Board ( 2 ea 8 ft. side boards )
- 32 ft. – 7-1/2 inch Riser Board ( 8 ea 4 ft. kick boards )
- 20 ft. – J-Tim ( top edge of skirt )
- 60 ft. – Cove Mould ( under front edge of treads and on top of j-trim )
- 4 ft. – Nosing ( nosing is at top of staircase meeting the hardwood/ceramic floor )
- 8 ft. – Hand Rail
- 2 ea. – Rail End Router
- 2 ea. – Wall Balls
The materials for the upper set of stairs ‘the open one side Stairway system’:
- 7 ea. – 48 inch Stair Treads – RH Mitre
- 4 ft. – Nosing ( nosing is at top of staircase meeting the hardwood/ceramic floor )
- 16 ft. – 9-1/2 inch Skirt Board ( 2 ea 8 ft. side boards )
- 32 ft. – 7-1/2 inch Riser Board ( 8 ea 4 ft. kick boards )
- 24 ft. – J-Trim ( top edge of skirt )
- 70 ft. – Cove Mould ( under front edge of treads and on top of j-trim )
- 1 ea. – 48 inch Newel Post starting newel ( on the first stair tread )
- 1 ea. – 42 inch Newel Post landing newel ( on the nosing at the top of the stair case )
- 6 ea. – 36 inch Balusters ( front baluster on stair tread )
- 7 ea. – 40 inch Balusters ( back baluster on stair tread )
- 8 ft. – Hand Rail
- 2 ea. – Newel Mounts
- 13 ea. – Dowel Screws
Note: on a renovation job we allow for 12 inch skirt boards
* How To Measure Level Run Rail:
If you have any ‘Level Run Rail’ in your house ( a rail system not on the staircase ) you need to use 42 inch Newel Post and 36 inch balusters to secure this space. Rule of thumb is that you need 3 balusters per foot and any span over 10 liner feet should have a middle post. Also note the rail height minimum is 36″ to meet current Canadian Building Codes.
For example if you have 9 feet of level run rail at the top of your stairs you need:
- 1 ea. – 42 inch Newel Post ( the post at the top of the staircase )
- 1 ea. – 42 inch Half Newel Post ( this post will hit the wall )
- 9 ft. – Hand Rail
- 9 ft. – Nosing
- 27 ea. – 36 inch Balusters
- 1 ea. – Newel Mount
- 27 ea. – Dowel Screws